
GRATIS
Michigan State University vía Coursera
GRATISCurrent Gen 3D Game Prop Production

Cursos gratis (Auditar)


Inglés

NaN

Guía de Registro en Coursera

Acerca de este curso
Compártelo


- Week 1: Blocking-In Model
- To start the project we will choose an object to model, gather reference, and create a initial, rough block-in of the model. The goal is to understand as much about the object as we can before we start modeling. This will likely be the lightest workload of the course, so make sure to take the extra time to check over the essentials module and make sure you have mastered the skills covered there. Later weeks will be much more time-consuming.
- Week 2: Mid-Poly Block-In Model
- In this module you will work to create the form of your model. This mid-poly block-in will not be textured, nor smoothed into a high resolution model. The goal is to create a mesh that is accurate to your reference that can become the starting point for your high and low poly models. This is often the most challenging part of the process.
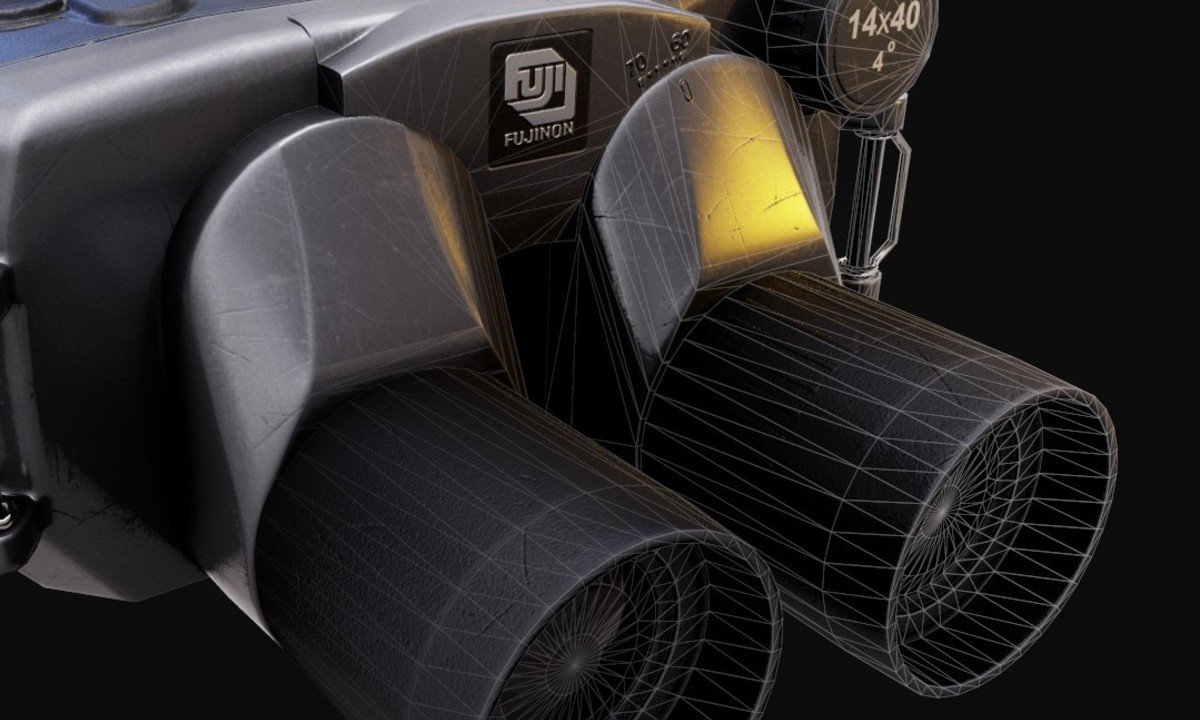
- Week 3: High-Poly Model
- In this module you will take the low poly block in and generate a high polygon mesh that is accurate to the real world model as possible. We will be using a combination of sub division modeling and . The sky is the limit with poly counts, this model will never be UV unwrapped, it will just be used to generate texture maps for the game-ready version.
- Week 4: Low-Poly Model
- In this module you will take the mid-poly model from week 2 and reduce the geometry. This is the model we will be UV unwrapping and baking maps to. The goal for this model is to still achieve the silhouette of our object while using fewer vertices than the mid or high poly model.
- Week 5: PBR Texturing
- In this module you will take your low-poly model and add back the missing detail from the high-poly by baking texture maps. You will also use Substance Painter to add color, material, and micro-details not present in the high poly. This is where the model will start to become photo-real. The goal here is to take a well crafted model and use texture maps to bring it to life.
- Week 6: Final Project and Presentation
- This last week is set aside for you to spend more time polishing you model and going back to fix any issues that might have popped up during production. Often you will get to the end of a project and realize there were things you should have approached differently. Taking the feedback you received from the previous week's project, resubmit a final, portfolio ready version of your work. Our goal is to finish the course with the best possible looking final result.
Cursos relacionados

GRATIS Aprendiendo a aprender: Poderosas herramientas mentales…

Deep teaching solutions

Español
GRATIS Programación para todos (Introducción a Python)
University of Michigan
Inglés
GRATIS The Science of Well-Being
Yale
Inglés

GRATIS Negociación exitosa: Estrategias y habilidades esenciales
University of Michigan
Inglés

GRATIS Primeros Auxilios Psicológicos (PAP)
Universitat Autónoma de Barcelona
Español
GRATIS Chino para principiantes
Peking University
Inglés
¿Te apetece valorar
nuestra web?
4.3 / 5 ( 3432 votos )
¿Preparado para tu próximo proyecto laboral?
Copyright © 2022 Mooc. Todos los derechos reservados